Learn how to make kombucha at home with this step-by-step brewing guide. From choosing ingredients to flavoring and carbonation, discover the secrets to delicious, probiotic-rich homemade kombucha.
The good news is that you can make your own kombucha, which is better, fresher, and less expensive if you have ever sipped it and wondered, “This is delicious, but why is it $4 a bottle?” I have been making kombucha in my kitchen for years, and I promise you it’s not nearly as difficult as it seems. It combines a small amount of magic, science experiments, and cooking skills. Pouring yourself a cold glass of something you’ve made from scratch is also very satisfying.
I will walk you through every step of the process in this guide, including ingredients, tools, advice, common mistakes to avoid, and even some flavor combinations that will outperform store-bought brands.
Let’s begin the brewing process.
1. What Kombucha Actually Is (And Why It’s Not Just Fancy Tea)
Kombucha is actually sweet tea that has undergone fermentation. A SCOBY, which stands for Symbiotic Culture of Bacteria and Yeast, is responsible for the magic. It is a living culture that resembles a jelly pancake and serves as the “starter” for sourdough bread.
By consuming the sugar in the tea, the SCOBY produces probiotics that are beneficial to your gut, tangy acids, and a little natural fizz. Long before hip cafes began carrying it in glass bottles, it had been prepared in kitchens for centuries.
I thought my first batch would be fussy when I brewed it. Rather, I found it to be surprisingly forgiving. The SCOBY performed as intended even though my timing was off and the temperature changed slightly. The wonderful thing about kombucha is that it’s alive, flexible, and, once you learn how to use it, you can customize it to your own preferences.

2. The Equipment and Materials You will Need
The fact that starting kombucha brewing doesn’t require a significant financial commitment is one of the reasons I enjoy it. What you actually need is as follows:
Ingredients:
Tea: Green tea is also effective, but black tea is the most reliable for novices. For the main brew, simply stay away from herbal teas as they lack the nutrients your SCOBY requires.
Sugar: The best sugar is white cane sugar. Until you know what you’re doing, brown sugar, honey, or substitutes can be challenging.
SCOBY & Starter Tea: You can make your own from raw kombucha or purchase them online or from another brewer.
Water: The best water is filtered or spring water because tap water’s chlorine can slow fermentation.
Equipment:
- Large glass jar (1 gallon)
- Tightly woven cloth or coffee filter (to cover the jar)
- Rubber band (to secure the cloth)
- Non-metal spoon for stirring
- Bottles with airtight lids (for the second fermentation)
Quick Story From My Early Days:
I once experimented with unfiltered tap water. My kombucha had nearly no fizz and took twice as long to ferment. I now give my SCOBY the best water possible because I treat it like a houseplant.
3. Brewing the First Batch: Step-by-Step
At this point, the scent of tea and sunshine begins to permeate your kitchen. The goal of the initial fermentation is to create your foundational kombucha.
Step 1: Prepare the Sweet Tea
- Boil 4 cups of water.
- Add 6-8 tea bags (or 2 tablespoons loose tea).
- Steep for 5-10 minutes, then remove tea.
- Stir in 1 cup sugar until dissolved.
- Add enough cool water to make a full gallon. Let it cool completely.
Step 2: Include Starter Tea and SCOBY
Pour the cooled tea into your jar. Gently slide in your SCOBY and add 1-2 cups starter tea.
Step 3: Cover and Ferment
Put a cloth over the jar and seal it. Put it somewhere still, dark, and warm (68 to 78°F).
Step 4: Taste and Adjust
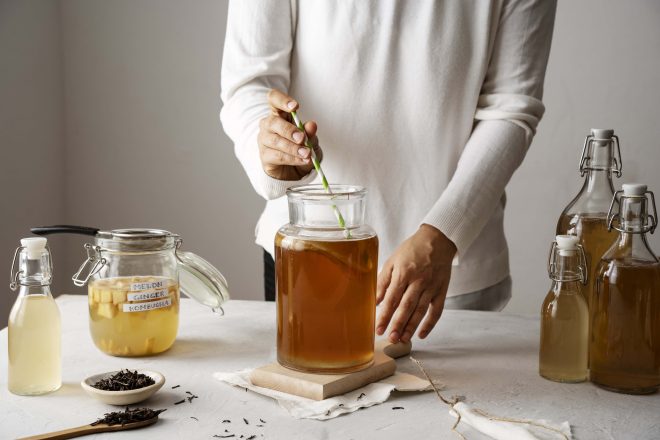
Around day 7, begin tasting. Sneak a sample from beneath the SCOBY using a straw:
- Give it more time if it’s too sweet.
- Bottle it immediately if it’s too tart.
My First Mistake:
I left my first batch for more than three weeks. My final product was essentially kombucha vinegar. Not so great for drinking, but good for salad dressing.
4. The Exciting Aspect: Carbonating and Flavoring
In order to make it really your own, you can add fruits, spices, and herbs during the second fermentation after the first one is finished.
Step 1: Take out the Starter and Scoby
Lift the scoby gently into a clean bowl. For your following batch, transfer 1–2 cups of the kombucha into a different container.
Step 2: Add Flavors
Some of my favorites:
- Ginger + lemon
- Strawberry + basil
- Pineapple + mint
- Blueberry + lavender
Step 3: Seal and Bottle
As you fill your bottles, leave a gap of about an inch at the top. Tightly seal.
Step 4: Repeat the Fermentation
For best fizz, let bottles sit at room temperature for 2 to 5 days. To prevent explosions, burp once a day (open briefly to release pressure).
Kitchen Disaster Confession:
I once skipped the burping of a batch of ginger. One bottle blew up like a kombucha geyser the following day. I had a sticky ceiling for weeks.
5. Troubleshooting and Storing
Once you’re satisfied with the fizz and flavor of your kombucha, put it in the refrigerator to slow the fermentation process.
How long it can be stored in the fridge:
Store it in the refrigerator for one to three months. With time, the flavor might become deeper.
Typical Problems & Solutions:
- Mold on SCOBY: Throw out the batch, clean it up, and start over.
- No fizz: A warmer location or additional sugar during the second fermentation may be required.
- Too Sweet/Tart: Modify the initial fermentation period for the subsequent batch.
Last Word of Advice: If the flavor of your kombucha varies from batch to batch, don’t freak out. The fact that you are brewing with living cultures rather than a machine adds to the allure.
You may also like to read about: Top 10 Ways Kombucha Can Boost Your Sex Life, Top 10 Kombucha Benefits
GIPHY App Key not set. Please check settings